Custom Classroom Door Decor Laser Cut: A Guide to Perfect Personalization
Walking into a classroom should feel like entering a community, not just a room. The door is the threshold where anxiety often meets anticipation, especially for younger students or those returning after a long break. This is why Custom Classroom Door Decor Laser Cut projects have become such a vital tool for educators and creators alike. It is not merely about aesthetics; it is about signaling warmth, organization, and personality before a single word is spoken. However, while the concept seems straightforward—cut some wood, stack some layers, hang it up—the execution often trips people up. Many beginners and even experienced crafters overlook critical details in file preparation, material selection, and assembly, leading to results that look cluttered rather than charming.
If you are considering creating these signs for your own classroom, a teacher appreciation gift, or as a product for your small business, understanding the nuances of layered design is essential. The difference between a professional-looking sign and a hobbyist mishap usually comes down to planning. Let’s explore the common pitfalls associated with these designs and how to ensure your final product makes the right first impression.
The Trap of Over-Complicating Layered Designs
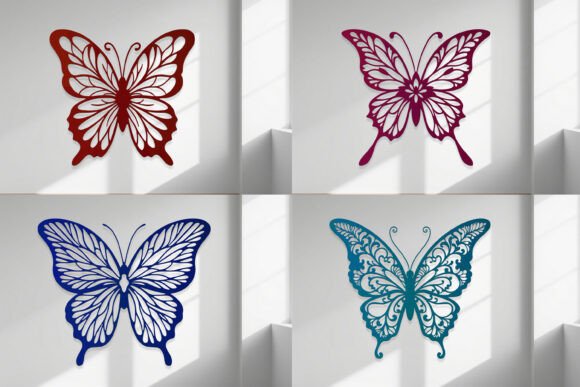
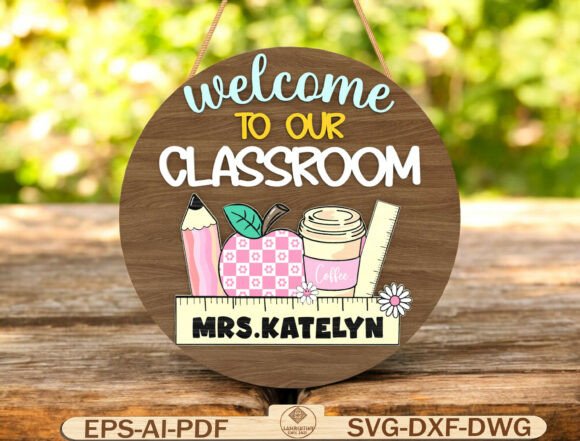
One of the most frequent mistakes seen in Welcome To Our Classroom SVG projects is the assumption that more layers equal higher quality. Beginners often grab complex files with ten or twelve intricate layers, thinking this demonstrates skill. In reality, excessive layering can create visual noise. When you combine pencils, apples, rulers, flowers, and coffee cups in a tight circular composition, too many overlapping elements can make the text illegible from a distance. A classroom door sign needs to be readable from five to ten feet away. If the teacher’s name is buried under three layers of decorative foliage, the personalization effort is lost.
The Better Approach: Stick to a balanced hierarchy. Use the base layer for structure, the middle layers for thematic elements like the school supplies mentioned in the description, and the top layers strictly for high-contrast text. Ensure the customizable teacher name stands out. If you are using natural wood, consider painting only the text layer or using a contrasting stain to ensure readability. Simplicity often communicates professionalism better than complexity.
Ignoring Material Thickness and Tolerance
A technical error that ruins many laser-cut projects is ignoring the physical properties of the material. Digital files are two-dimensional, but your output is three-dimensional. When you download formats like SVG, DXF, or EPS for use with Glowforge, xTool, or Cricut machines, the software does not automatically account for the kerf (the width of the cut) or the thickness of the material unless you set it correctly. Using 3mm MDF for a design intended for 6mm plywood will result in loose joints and a wobbly sign. Conversely, forcing thick acrylic into slots designed for thin wood can crack the material.
Furthermore, different materials behave differently under heat. Acrylic melts and fuses, while wood chars. If you are assembling a multi-layered round sign, you must test-fit your pieces. A common oversight is failing to sand the edges of laser-cut wood. The charred edges, while rustic, can rub off on hands and walls. For a polished look, especially if this is a gift for teacher appreciation, lightly sanding the edges or using a sealant is non-negotiable. This step transforms a rough craft item into a durable piece of decor.
File Compatibility and Software Misunderstandings
Many users assume that because a file is labeled "compatible with CNC machines," it will work perfectly out of the box. This is a dangerous assumption. The included formats—SVG, DXF, EPS, AI, PDF, DWG—serve different purposes. SVGs are great for web-based cutters like Cricut Design Space, but they sometimes contain hidden nodes or open paths that cause errors in professional software like LightBurn or Adobe Illustrator. Users often skip the step of inspecting the vector paths. This leads to the laser head making erratic movements or cutting lines that were meant to be engraving guides.
Practical Advice: Always open your downloaded file in your preferred design software before sending it to the machine. Check for closed paths, remove any duplicate lines, and verify that the layers are organized logically. If you are a beginner, start with the PDF or PNG reference images provided in the download to understand how the layers stack. This visual guide is crucial for avoiding assembly errors later. Remember, this is a digital download; there is no physical support team coming to fix a misaligned cut. Your preparation is your safety net.
Color Choices and Environmental Context
When designing for a classroom, context is king. A mistake many makers make is choosing colors based on personal preference rather than the classroom environment. Bright neon acrylics might look stunning on a white background online, but they can be overstimulating in a preschool setting. Similarly, dark stained wood might look elegant but can disappear against a dark-colored classroom door. The goal is a cheerful, inviting entrance, not a visual clash.
Consider the lighting of the hallway. Is it fluorescent? Natural? Dark corridors require lighter, reflective materials or high-contrast paint jobs. If you are using natural wood friendly designs, remember that wood tones vary. A light birch plywood will look very different from walnut. Test your finish on a scrap piece first. For back-to-school classroom setups, pastel tones or primary colors often work best, but they should be muted enough to remain sophisticated. The inclusion of cute elements like coffee cups and flowers should complement, not dominate, the overall aesthetic.
Assembly and Installation Oversights
Finally, the installation phase is where many projects fail. A heavy, multi-layered wooden sign requires more than a single strip of double-sided tape. Humidity changes in schools can weaken adhesives over time. Using proper mounting hardware, such as small nails or heavy-duty command strips rated for the weight, is essential. Additionally, ensure the sign is level. A crooked welcome sign subconsciously signals disorganization.
For those creating these for small business physical products, packaging is also part of the experience. Laser-cut pieces can shift during shipping. Proper padding and clear assembly instructions add value to your product. If you are giving this as a teacher appreciation gift, including a small tube of wood glue or extra adhesive dots shows thoughtfulness and ensures the recipient can easily assemble it without frustration.
Creating a Custom Classroom Door Decor Laser Cut sign is a rewarding project that blends creativity with functionality. By avoiding these common mistakes—over-complication, material ignorance, file negligence, poor color choices, and weak installation—you ensure that your creation serves its true purpose: welcoming students with warmth and personality. Whether you are an educator decorating your own space or a creator crafting gifts, attention to these details will elevate your work from simple decor to a cherished classroom staple.